
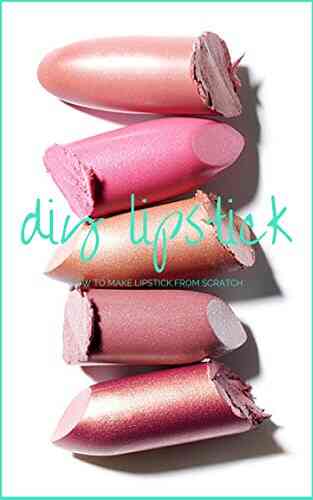
DIY Lipstick: A Step-by-Step Guide to Creating Your Own Customized Cosmetics

Have you ever been on the hunt for the perfect lipstick shade but couldn't find exactly what you were looking for? Well, look no further because we have the ultimate solution for you - making your own lipstick from scratch! Not only is it a fun and creative project, but it also allows you to customize the color, texture, and finish to match your preferences. In this article, we will guide you through the process of creating DIY lipstick, so get ready to unleash your inner makeup artist!
Materials You Will Need
Before we dive into the step-by-step guide, let's gather all the materials you'll need to make your homemade lipstick:
- Beeswax or soy wax pellets
- Coconut oil or any other vegetable-based oil (e.g., almond oil, olive oil)
- Pigment powders or old lipstick for color
- Essential oils for fragrance (optional)
- Small heat-safe containers or empty lipstick tubes
- Double boiler or a heat-resistant bowl and a pot
- Stirring utensil (preferably a wooden or silicone spatula)
- Measuring spoons
Step-by-Step Guide: Making Your Own Lipstick
Now, let's get into the nitty-gritty of creating your DIY lipstick. Follow these steps, and you'll have a homemade cosmetic masterpiece in no time:
4.4 out of 5
| Language | : | English |
| File size | : | 1411 KB |
| Text-to-Speech | : | Enabled |
| Screen Reader | : | Supported |
| Enhanced typesetting | : | Enabled |
| Word Wise | : | Enabled |
| Print length | : | 17 pages |
| Lending | : | Enabled |
Step 1: Prepare your work area
Creating lipstick can get messy, so it's essential to set up a clean and organized workspace. Lay down some newspaper or wax paper to protect your surfaces, and gather all your materials to ensure a smooth and efficient process.
Step 2: Choose and prepare your color
The beauty of DIY lipstick is that you can tailor it to your exact shade preferences. You can either use pigment powders or repurpose old lipsticks that you haven't been using. If you choose to use old lipsticks, scrape off a small amount and set it aside for later. If using pigment powders, select the desired colors and measure out a teaspoon or as per your preferred intensity.
Step 3: Create the lipstick base
In a double boiler or a heat-resistant bowl placed over a pot filled with water, melt approximately one teaspoon of beeswax or soy wax pellets with one teaspoon of coconut oil. Stir gently until fully melted and well combined. This mixture will serve as the base of your lipstick.
Step 4: Add color and fragrance
Once your wax and oil base is melted, it's time to add your selected color and fragrance. If you're using old lipstick, mix in the scraped-off bits until fully incorporated. If using pigment powders, gradually add them to the mixture while stirring continuously. You can also add a few drops of your favorite essential oil for a pleasant fragrance.
Step 5: Pour the mixture into containers
Using a heat-resistant utensil, carefully pour the warm mixture into your chosen containers or lipstick tubes. Make sure to leave some space at the top to prevent any overflow when the lipstick solidifies. Allow the lipstick to cool and solidify for about 15-20 minutes.
Step 6: Clean up and decorate
While your lipstick is setting, clean up your workspace and utensils. You can wipe any excess lipstick residue with a damp cloth and wash your utensils with warm, soapy water. Once your DIY lipstick has fully solidified, you can decorate the containers by labeling or adding decorative stickers to give a personal touch.
Tips and Tricks for the Perfect DIY Lipstick
Making your own lipstick can be a trial-and-error process, but these tips will help ensure your success:
- Experiment with different ratios of wax and oil to achieve your desired consistency. More wax results in a firmer lipstick, while more oil gives a softer texture.
- Test your lipstick on your wrist before applying it to your lips to check for any allergic reactions.
- Add pigments gradually to achieve the desired color intensity. You can always add more, but it's challenging to lighten the shade once it's too dark.
- Consider adding natural moisturizing agents like shea butter or cocoa butter to hydrate your lips while wearing your homemade lipstick.
Creating your own lipstick from scratch is a rewarding and empowering experience. Not only can you customize the color to match your exact preferences, but you also have control over the ingredients used, ensuring a natural and safe product. By following this step-by-step guide, you'll be able to make unique lipsticks that reflect your personal style. So go ahead, unleash your creativity, and enjoy the world of homemade cosmetics!
4.4 out of 5
| Language | : | English |
| File size | : | 1411 KB |
| Text-to-Speech | : | Enabled |
| Screen Reader | : | Supported |
| Enhanced typesetting | : | Enabled |
| Word Wise | : | Enabled |
| Print length | : | 17 pages |
| Lending | : | Enabled |
Ever wanted to know how to make lipstick? Well, here's your chance!
Here's what's new!
- Suppliers to get raw cosmetic ingredients
- Two cream lipstick base recipes -- including a vegan option
- 5 color recipes including a baby pink, and deep berry color which is popular for fall
- 11 tips on how the professionals create their perfect lipstick
- Step-by-step instructions on how to make lipstick
... and more!
Do you want to contribute by writing guest posts on this blog?
Please contact us and send us a resume of previous articles that you have written.


Light bulbAdvertise smarter! Our strategic ad space ensures maximum exposure. Reserve your spot today!

 Richard Wright"Unleashing the Untamed: Explore the Ruthless Sinners MC and Jagger Choice!"


 Philip BellWatershed Colin Dodds: The Enigmatic Music Composer Paving New Paths in the...
 Virginia WoolfFollow ·5.9k
 Daniel KnightFollow ·15.5k
 Jerry WardFollow ·4.5k
 Sam CarterFollow ·9.9k
 Howard BlairFollow ·17.1k
 Nathaniel HawthorneFollow ·19.4k
 Ashton ReedFollow ·10k
 Blake KennedyFollow ·7.3k
 Dashawn Hayes
Unveiling the Intriguing World of Stephanie Plum, Kate...
Chapter 1: Stephanie Plum – An...

 Colin Richardson
Renegades: The Last Gunfighter 12 - A Heart-Pounding...
Get ready for an action-packed ride as we...
 Emmett Mitchell
The Rainbow Beyond Tears - A Journey of Healing
Have you ever wondered what lies...

 Bret Mitchell
Unveiling the Secrets Beneath the Tell Tale Sky: A...
Have you ever looked up at the sky and...
 Corey Hayes
37 Motivational And Life Changing Lessons From Thich Nhat...
Thich Nhat Hanh is a renowned Zen master,...
 Jace Mitchell
Buy Bullet: An Orphan Short Story
Are you ready to embark on a gripping...

 Branson Carter
Albion Dark Long Poem: An Enchanting Journey into the...
Are you ready to immerse yourself in...
 Jorge Amado
The Hostile Trail Matt Slaughter: A Captivating Journey...
Are you ready to embark on a thrilling...
 Luke Blair
The Adorable Grandma Peek Boo Crochet Pattern 131: Create...
Have you been searching for the perfect...
 Bret Mitchell
The Battle of Corrin: A Turning Point in the Known...
When it comes to pivotal moments in...
 Andres Carter
Little Gnome Home Crochet Pattern - Create Your Own...
Imagine a world where whimsical creatures...
 Bradley Dixon
Terraforming The Atmosphere Of Venus: A Journey Towards...
Are you ready to embark on a journey that...
4.4 out of 5
| Language | : | English |
| File size | : | 1411 KB |
| Text-to-Speech | : | Enabled |
| Screen Reader | : | Supported |
| Enhanced typesetting | : | Enabled |
| Word Wise | : | Enabled |
| Print length | : | 17 pages |
| Lending | : | Enabled |
